Widgets are the reason for applications. Widgets are included within the sections on each tab.
To know the complete list of widgets follow the documentation. To know how to add tabs and sections go to the documentation.
Below are the steps to add a new widget.
We will continue with the example of the application my-first-app created
in the First application section.
-
The first thing we will do is add the query that we want to visualize. Inside the file
/src/resources/request.jswe add the query.requests.add( 'myFirstWidgetQuery', new RequestApi({ query: `from demo.ecommerce.data group every 1h by method, statusCode select count() as count`, dates: dateRange.fromNow(1, 'day'), }) );At this point, we have only declared a simple query. For more information about requests, see the documentation.
-
Inside the
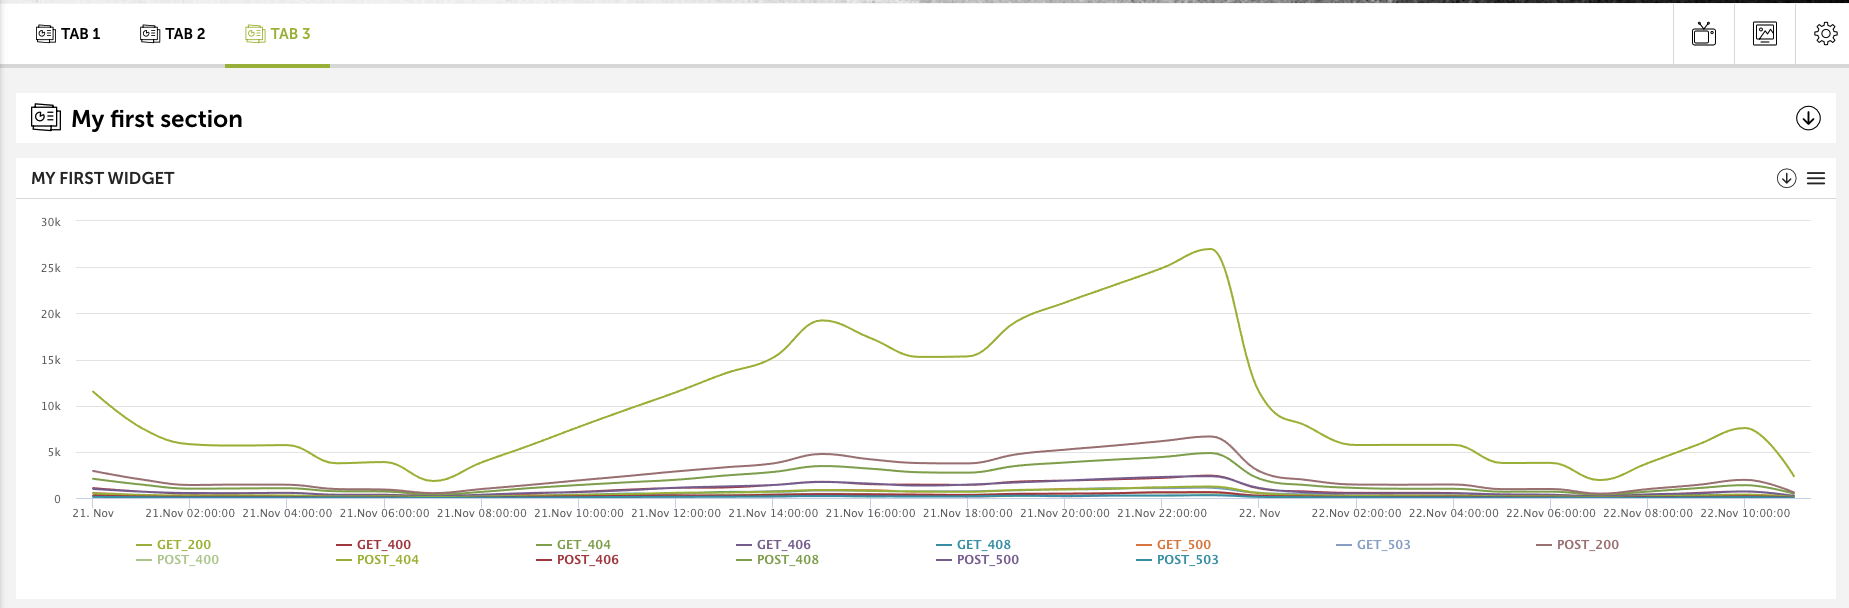
/src/tabs/tab3.jsfile we will add a new widget. We will use a line graph as an example.import Tab from '@devoinc/applications-builder/Tab'; import Section from '@devoinc/applications-builder/Section'; import linesWidget from '@devoinc/applications-builder/widgets/lines'; export default () => { let tab = new Tab('main3'); let sec1 = new Section('section31'); tab.addSection(sec1); let widget = null; widget = linesWidget('chart1'); widget.setRequests([requests.get('myFirstWidgetQuery')]); widget.setKeys(['method', 'statusCode']); widget.setValue('count'); sec1.addWidget(widget); return tab; };At this point we have imported the lines charts widget a added it to secction with the identifier
section31. This widget has the identifierchart1and it is using the request with themyFirstWidgetQueryid. -
Now, we need to edit the content of the HTML to add this new widget inside the section of the third tab. In the
app.htmlfile add a new<article>element inside the<section>element that as the idsection31.<main class="lt-vapp-main" id="main3"> <section class="lt-vapp-section" id="section21"> <h3 class="lt-vapp-section-title"> <i class="lticon-analytics_presentation_statistics_graph"></i> <span>${__('My first section')}</span> <span class="lt-vapp-section-collapser lticon-vapp_expand"></span> </h3> <article class="lt-vapp-widget md-12 lg-12 tv-12" id="chart1"> <header class="lt-vapp-widget-header"> <h3>${__('My first widget')}</h3> <nav class="lt-vapp-widget-options"> <span class="lt-vapp-widget-collapser lticon-vapp_expand"></span> <span class=" lt-vapp-widget-menu-launcher lticon-thin-0069a_menu_hambuger_bold " > <ul> <li class="lt-vapp-widget-action-capture"> <i class="lticon-polaroid_picture_image_photo"></i> <span>${__('Screenshot')}</span> </li> <li class="lt-vapp-widget-action-download"> <i class="lticon-computer_laptop_download"></i> <span>${__('Download data')}</span> </li> <li class="lt-vapp-widget-action-zoom"> <i class="lticon-zoom_in"></i> <span>${__('Zoom')}</span> </li> <li class="lt-vapp-widget-action-gotosearch"> <i class="lticon-search_find_zoom2"></i> <span>${__('Go to query')}</span> </li> </ul> </span> </nav> </header> <div class="lt-vapp-widget-graphic inner-padding"></div> </article> </section> </main>This new HTML element has the necessary structure to be able to visualize a graph, including the widget header and the available options. If necessary you could edit it.
Up to this point, we have added a new widget with a simple chart.